- After Effects Tutorial
How to Create a Twirl Transition in Adobe After Effects?
Mar 20,2019• Proven solutions
Even though the Twirl transition may not be the most popular choice among professional video editors, in certain contexts this effect can be quite useful. The trouble with twirl transitions is that you will have a tough time maintaining the illusion of realism one you apply them to the footage since the effect is going to distort the image. Read on, if the project you’re working on doesn’t require you to stick to the conventional rules of video editing and you would like to create a dynamic transition between two video clips.
Create Twirl effects with After Effects alternative: FilmoraPro

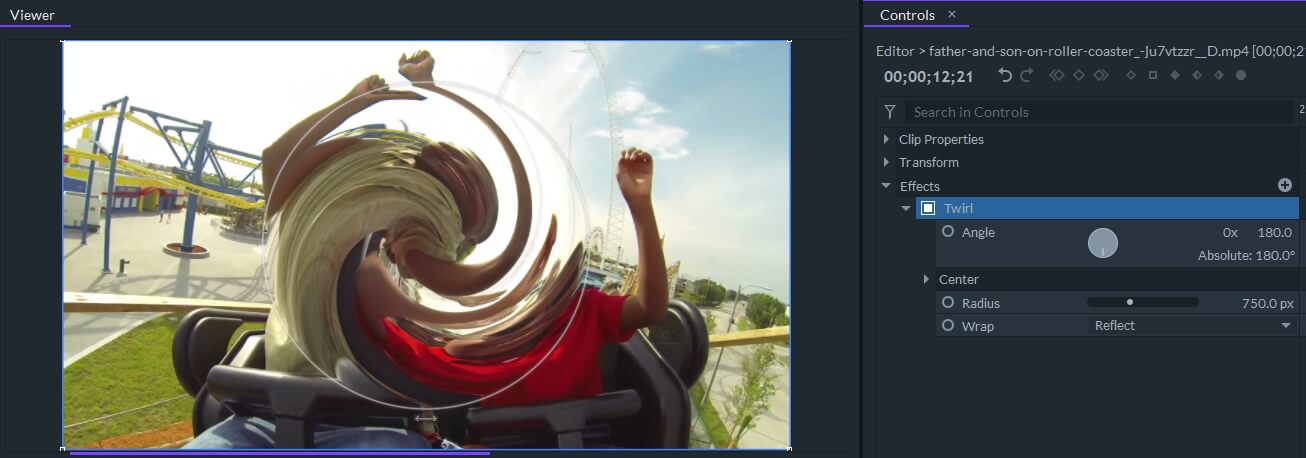
FilmoraPro video editing software gives you more controls about video editing, you can add twirl transition preset effects to video clips and then customize the angle, radius and wrap settings based on your needs.
Creating a Twirl Transition in AE
Open your project in Adobe After Effects and make sure that the clips are correctly positioned on the timeline so that you can add a transition between them. Locate the Twirl effect using the Effects Browser and then add it to both clips. The effect’s Angle, Radius and Center properties are going to be displayed in the Effect Controls panel, but you just have to adjust the Angle setting in order to create a transition.

Position the playhead approximately five frames before the end of the first clip, set the Angle value to 0 and add a keyframe. Jump five frames forward, change the Angle value to -100, add another keyframe and proceed to the same on the second clip. The only difference is that you have to set the Angle value to 100 at the beginning of the second clip before adding a keyframe and change it back to 0 on the second keyframe that should be added approximately five frames after the start of the second clip.

Create a new Adjustment Layer, position it over the transition you just created and apply the Optics Compensation effect to it. You can quickly access this effect by typing its name into the Effects Browser. Go to the Effect Controls panel and click on the Reverse Lens Distortion option and add three Field of View keyframes at the beginning, the middle and the end of the transition. Change the value of the Field of View property to zero at the start of the transition, increase it up to 100 at the end of the first clip, and then decrease the value back to zero at the third keyframe. Optionally, you can apply the Motion Blur effect to the Adjustment layer, but remember to keep the effect’s default settings and that’s it you’ve created a Twirl transition.

Making an Advanced Twirl Transition in AE
In case you would like to dedicate more time to the process of creating a Twirl transition, you can try combining several effects and animating each of them separately with keyframes. Once you’ve placed the clips on the timeline, you should create two adjustment layers and position them over each clip. You can then add the Motion Tile, Transform, Twirl and Optic Compensation effects to both adjustment layers. Make sure to add the effects in that exact order, because arranging them differently can reduce the quality of your transition.
Use the Transform effect to zoom out of the first clip, and set the first keyframe approximately five frames before the end of the clip. Make sure that the Scale value is at 100, then go to the very end of the clip and reduce the Scale value to 20%. Turn off the Composition Shutter Angle option and then insert a custom Shutter Angle value in order to add some artificial blur to the zoom out effect or just add a blur effect you like from the Effect&Pressets panel to the first adjustment layer. With the adjustment layer selected, you should press U to see the keyframes you created, select them, and right-click on them to gain access to the Keyframe Assistance submenu. Click on the Easy Ease option and then click on the Graph Editor icon to create an exponential curve towards the end of the cut. By doing this you will increase the speed at which the clip is zoomed in before the cut.
Adjust the Twirl angle property and add keyframes that go from 0 to -100 and from 100 back to zero. Repeat all the steps you’ve taken to animate the first effect and proceed to adjust the properties of the Optic Compensation effect. Expand the Field of View at the end of the first clip and then use the Height and Width Motion Tile settings to get rid of the black parts of the screen. Reverse the values for all keyframes, so that each effect starts at the maximum value when the second clip begins and slowly goes back to zero. Additionally, Adobe After Effects lets you save the Twirl transition you created as a preset, and you can just change the clips and use the same dynamic transition in a different project.
Conclusion
Custom made transitions can be a bit difficult to create, but if you don’t want to spend time experimenting with different combinations of effects, you can quickly animate the Twirl effect and create a nice Twirl transition between two video clips. What is your favorite method of creating Twirl transitions in Adobe After Effects? Leave a comment and let us know.
Bring up your video to a professional level with straightforward tools.
Try It Free Try It Free


Liza Brown
chief Editor
0 Comment(s)